Back pain is very common. There is a statistic that says 80% of adults will experience back pain at some point in their lifetime. The most common cause of back pain comes down to one thing: posture. When your mother told you to stand up straight, she was right: as gravity pulls on our bodies day after day, hour after hour, if it is improperly aligned (like when you slouch), your muscles strain to move you toward vertical. Small stabilizer muscles overwork and eventually start to hurt. Long term incorrect posture can lead to more serious issues, like disc problems and debilitating pain. Before starting any exercise plan and to fully understand the nature of your back pain, it is important to get a full evaluation from a medical professional. To understand how posture affects pain, let's look at the lower back and pelvis.
Common causes of lower back pain can be tight hamstrings, tight hip flexors, weak core or all of the above. When you spend much of your time sitting, at a desk or in a car, your hip flexors and hamstrings are in a constant state of contraction. The longer you sit, the more likely it is for your muscles to tire and you start to slouch. Slouching causes the tailbone to aim forward, which shortens the hamstrings even more, as they attach to the base of the pelvis at the sit bones (ischial tuberosities). Long term tightening of the hamstrings and hip flexors puts strain on the lower back, which then has to compensate when you move. When the hamstrings pull on the sit bones, it brings the lower back out of the natural lumbar curve, causing a flattening of the lower back which weakens the muscles and they lose stability. Tight hip flexors cause the tailbone to aim backward which causes a deepening of the lumbar curve which can cause compression in the lumbar vertebrae and lead to lower back pain and disc problems. The Psoas muscles attach to the front lumbar vertibrae and will then pull and cause pain and misalignment of the lower back. Unfortunately having both tight hamstrings and tight hip flexors doesn't cause a net zero cancellation, but rather causes more problems. When you have a weak core (which includes the hip flexors, abdominals, pelvic floor and lower back muscles), the lower back is overused and can often strain. Strengthening the core can make a huge difference in your back pain.
So what to do? Step one is to work on your posture. How you use your body for the majority of your day matters more than just doing a few poses. If you can work to prevent the problem in the first place, all the better. Think about stacking your joints whether you are sitting or standing. The more awareness you have surrounding how you sit and stand plays a huge part in how your body feels and functions.
In terms of addressing the hamstrings and hip flexors, there is a lot that can be done to improve how they affect the pelvis, and therefore your lower back. It is important to understand where these muscles attach, so that you are better able to stretch them and get the pressure off of your lower back.
 The Hamstring muscle group is made up of 3 muscles that attach at the sit bone and the lower leg so that your knee can bend. Contracting the hamstrings bends the knee, they stretch and elongate when the leg is straightened; the tighter this muscle group is, the harder it is to straighten the leg. When hamstrings are chronically tight, it is common for the lower back to stretch instead, or take the brunt of the force that belongs in the legs. For example, when you fold forward over your legs, ideally you are moving the sit bones away from the heels to stretch the hamstrings, but if they are tight, the lower back may round (keeping the sit bones closer to the heels), so that lower back takes the brunt of the stretch. You feel like you are folding forward, but you are not targeting the muscles that really need to stretch. Over time, the lower back gets stretched out, but not the hamstrings so they pull on the sit bones which throws off your posture and you end up with lower back pain.
The hip flexors include the Psoas and Iliacus muscles which together are the Iliopsoas group. These muscles attach to the vertibrae and Iliac bones (of the pelvis) and connect down to the Femur (upper leg). When they contract they bring the thigh toward the chest (flexing the hip) and when the hip extends, they lengthen. When these are tight, it makes it hard to bring the pelvis to a vertical alignment when you are standing. If your core is also weak it may create a deeper lordosis in the lower back (an increasing of the natural lumbar curve) which can compress the spine and vertebral discs and cause pain.
Working on the hamstrings and hip flexors should be a daily or every other day endeavor if you want to make a meaningful difference. As I wrote earlier, you are trying to undo posture habits that occur all day long every day, so every little bit helps. When you are stretching, it is important not to over stretch or force your body to open when it isn't ready. On a scale of 1-10, where 10 is excruciating pain and 1 is nothing, the stretch should create a sensation between 3-7. Make sure you are breathing deeply and slowly so that the opening is gradual and with ease. Forcing a stretch where you are fighting yourself will only lead to injury. The deeper you breathe, the more you relax and the easier it is for the body to open.

 When stretching the hamstrings it is important to focus on moving the sit bones away from the heels; at first the legs might not straighten all the way and that is fine. Place your left knee on the floor under your left hip and extend your right leg in front of you, foot flexed with the toes aiming for the ceiling. If getting down on the floor is challenging, you can stay standing and just place your foot on a step or stool in front of you. Have a chair or wall handy to rest your hands upon. With your right leg extended, tip your pelvis forward so that the sit bones move away from your right heel. Place your hands on the floor or blocks on either side of your right leg (or on a chair or wall if you are standing). Stay for 5-10 deep, slow breaths, then repeat to the other side.
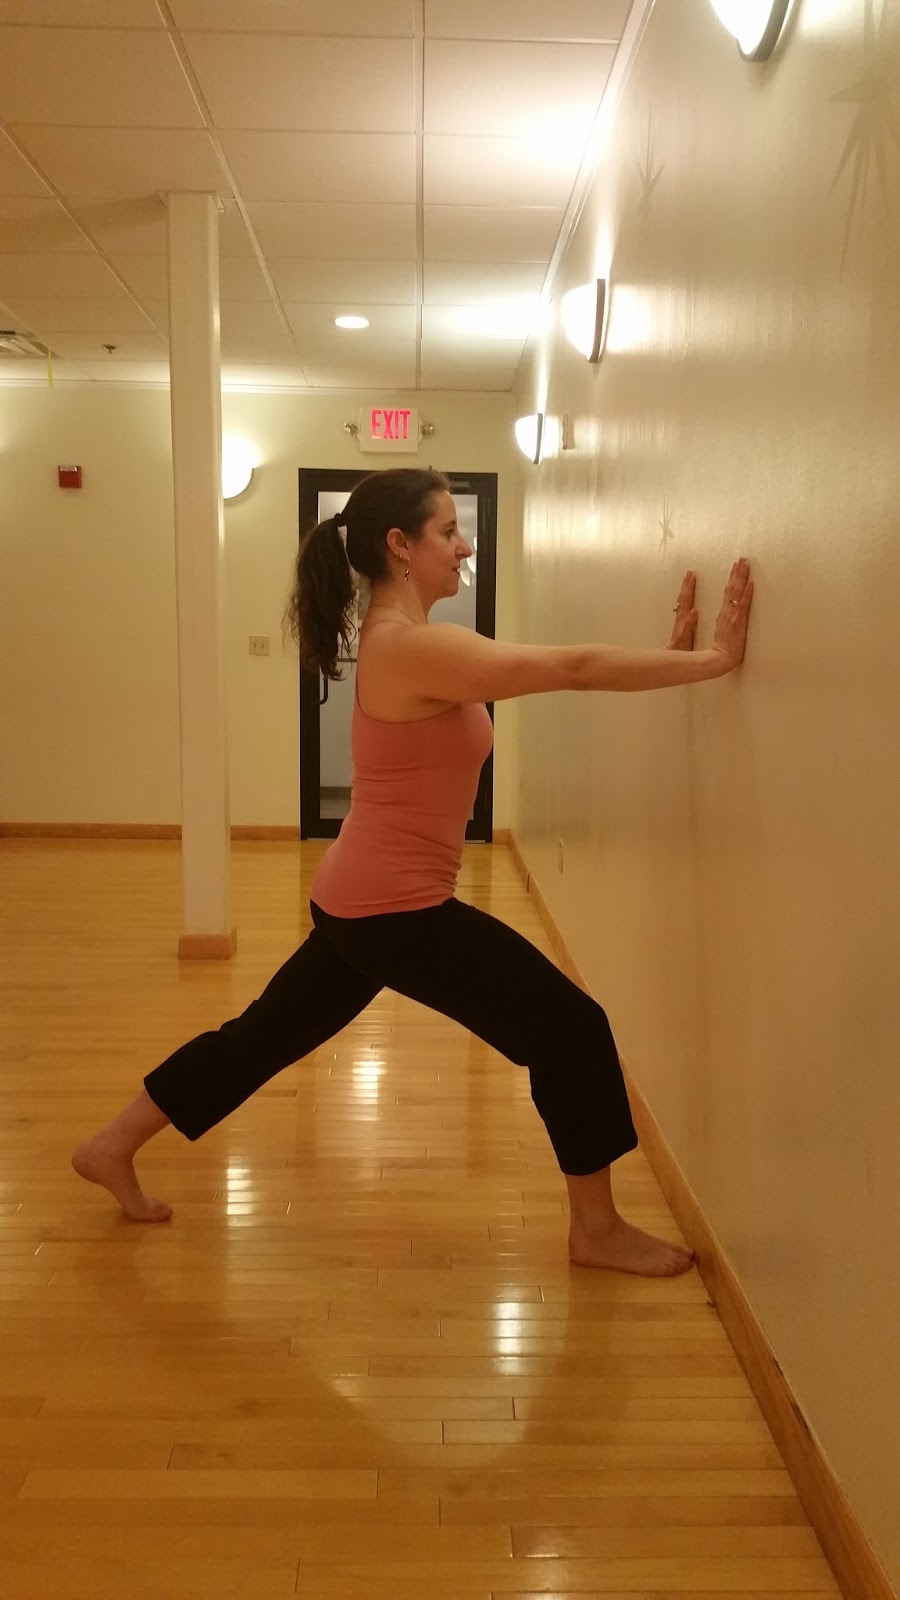
 When stretching the hip flexors, start in the same position on your left knee with your right leg extended. Bend your right knee until the knee is over your right ankle and place your hands on the floor or on blocks on either side of your right foot. You can stay there if you are already feeling a stretch in front of your left hip, or you can place your hands on your right knee, bringing yourself more vertical, or raise your arms over your head if that feels comfortable. If the floor is not available stand facing a wall with your right foot at the wall and your left foot about 2-3 feet behind your left hip. Stand on the ball of your left foot, place your hands on the wall and bend your right knee over your right ankle, keeping the pelvis as vertical as possible. If you don't feel a stretch, step your left foot further back. Whichever variation you choose, stay for 5-10 deep, slow breaths then repeat to the other side.
The best change is gradual. You can't undo years of misalignment in a week. Give your body time to change by stretching daily and being patient and compassionate with yourself.

In addition to being the Director of Yoga and teaching yoga classes at Lumina Mind Body Studios, and on Facebook, Janine is also a Licensed Acupuncturist and Chinese Herbalist who practices at Integrative Therapeutics in Natick, MA.


